
BitLocker is a built-in encryption feature in Windows that helps protect your data by encrypting your hard drive and requiring you to authenticate before accessing your device. Enabling BitLocker is a vital step in keeping sensitive information safe from unauthorized access.
This guide will help you enable BitLocker on Windows, whether you're using it at home or in a business setting.
Windows Version: Make sure your system is running a compatible version (like Windows 10 Pro, Enterprise, or Education, or Windows 11 Pro and above).
TPM (Trusted Platform Module): Most modern computers come equipped with TPM, which is necessary for BitLocker. If your device doesn’t have TPM, you can still enable BitLocker using a USB key.
Administrative Rights: You’ll need admin privileges to turn on BitLocker.
Data Backup: It’s a good idea to back up your important files before you start the encryption process.
Open Control Panel:
Press the Windows Key + S, type "Control Panel," and hit Enter.
Navigate to BitLocker Settings:
Head to System and Security > BitLocker Drive Encryption.
Turn on BitLocker:
Find your drive (like "C:") and click on Turn on BitLocker.
Choose Authentication Method:
Decide how you want to unlock the drive:
Use a password.
Use a USB drive as a key.
Save Your Recovery Key:
Make sure to save the recovery key to your Microsoft account, a USB drive, or print it out. This key is crucial for unlocking the drive if you forget your password.
Select Encryption Options:
Pick between Encrypt Used Disk Space Only (which is faster) or Encrypt Entire Drive (which is more secure).
Choose the encryption mode (New Encryption Mode for modern devices or Compatible Mode for older systems).
Start Encryption:
Click Start Encrypting. The process will run in the background and might take a while, depending on the size of your drive.
To enable BitLocker on Windows 11:
Start by opening the Settings. You can do this by pressing the Windows Key + I or by searching for "Settings" in the Start menu.
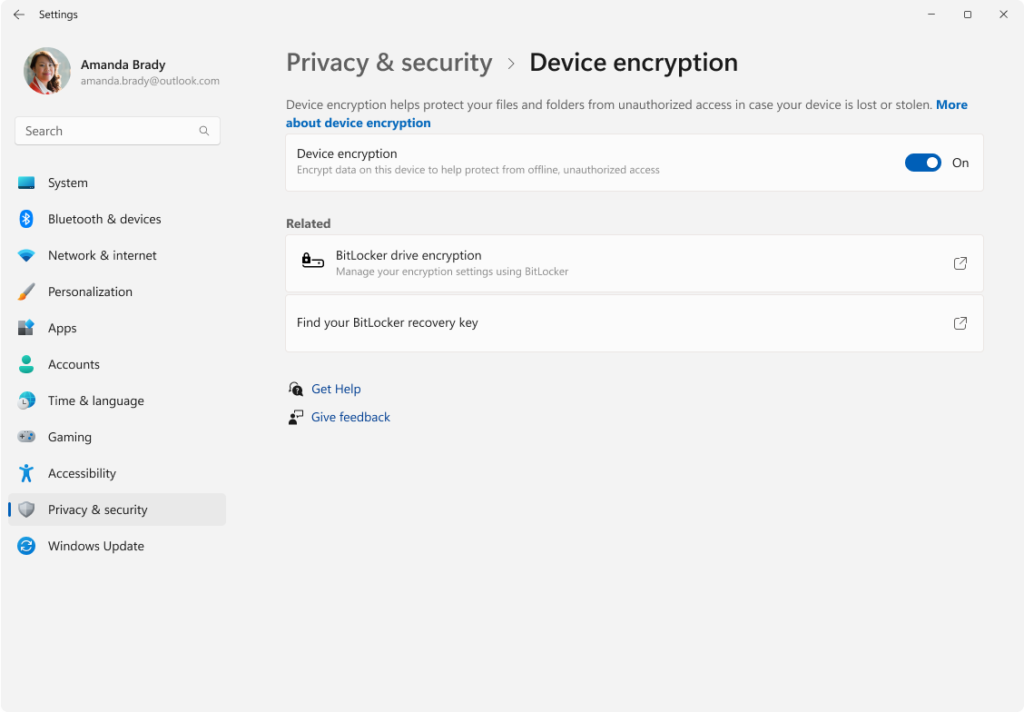
Next, head over to Device Security by navigating to Privacy & Security and then selecting Device Encryption.
Once there, simply turn on Device Encryption and follow the prompts to set up your recovery key.
If you're more of an advanced user or looking to automate the process, you can enable BitLocker via the Command Line.
First, open Command Prompt as an Administrator by searching for "cmd," right-clicking it, and selecting Run as administrator.
Then, run the command: manage-bde -on C: -recoverypassword, making sure to replace C: with the drive letter you want to encrypt.
Alternatively, you can use PowerShell.
Launch PowerShell as an Administrator by searching for "PowerShell," right-clicking, and selecting Run as administrator.
Then, execute the command: Enable-BitLocker -MountPoint "C:" -RecoveryPasswordProtector, again replacing C: with your desired drive letter.
A few important things to keep in mind: While modern systems usually handle encryption without a hitch, older devices might see a slight dip in performance.
It's also wise to store your recovery key in several secure places for extra safety.
Once your drive is encrypted, any files you save on it will be automatically encrypted and decrypted when accessed.
For businesses, BitLocker is a fantastic tool for data protection.
It encrypts laptops and desktops to keep sensitive information safe, helps meet compliance standards like GDPR, HIPAA, and CCPA, and ensures that data remains secure in case of theft or loss.
In conclusion, enabling BitLocker encryption is a simple yet effective way to protect your data on Windows. Whether you're securing personal devices or managing an IT environment, BitLocker provides strong security with minimal hassle. Just follow the steps above to encrypt your drives and keep your sensitive information safe.